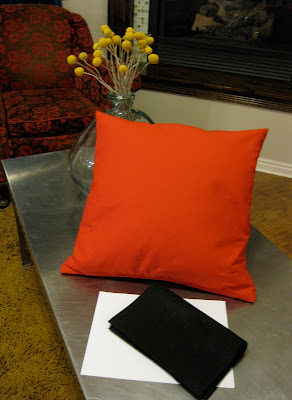
Felt has become one of my new best crafting friends...next to Mod Podge, that is! I love the endless possibilities of it and even better yet: No fraying! Here is a simple and elegant way to dress up your bed, sofa or favorite chair for very little money but with big impact! This craft takes a little more time to do, but it is worth a little extra work! Flowers say it best!
Materials you will need:
-plain fabric covered pillow form (any size will do)
-felt (3/4 yard)
-copy paper
-fabric glue
-several straight pins
Start by making 4 petal patterns. My pillow is 18"x18" so I made the largest petal pattern measuring approx. 6"x 3" but you can adjust it to your liking. Make each following pattern slightly smaller than the last.

Next, cut out felt petals using your patterns. For my pillow size I needed 20 of the largest petal, then 14 of the next size down, 8 of the next size and 4 of the smallest.

After all petals have been cut you are now ready to glue them to your pillow! Apply a small amount of fabric glue to the bottom corners of your petal......

then fold the corners in and hold for a few seconds while the glue starts to bond and take hold. Fabric glue can be very messy, making "webs" and leaving you with sticky fingers as you go. Be careful and wipe off hands and glue tip often!

Turn petal over and apply another liberal amount to the back bottom half of the petal.
Begin to lay them out in a circular form and use a pin to hold until glue dries.
HINT: I started with a petal in the 12 o'clock position, another in the 3 o'clock position, one in the 6 and another in the 9 o'clock position. Then I begin filling in the spaces between them to assure a more symmetrical look.
Once you are finished with the first layer, you can move onto the next size petal placing them over the first row. Place them slightly lower and between the large petals. Pin to hold.
Once you have finished all layers, you may have an empty space in the middle where all the smaller petals come together at the base. I cut out a "X" shaped petal and glued it in the center.

Center is covered and looking good! Finally!

HINT: If you are using black felt and have any glue dabs showing against the dark surface, color over them using a black Sharpie or permanent marker!
You are done! How does it look!? Now place your pillow on your favorite spot to relax and kick your feet up after all your hard work!

Pillow: $7
felt: $3
_____________________
Total cost: $13.60
Total time to complete project: 2 hrs.
 Photo: Better Homes and Gardens
 Photo: Apartment Therapy


