Saturday, February 27, 2010

Judge A Book By It's Cover

Who knew that a book could have so many purposes? Maybe someone should write a book called "101 Things To Do With A Book" and when you are done reading it you can make it into something! I am always amazed at the talent and creativity in this world and a few short minutes on the computer reminds of that every day! I am feeling a very strong urge to go buy up all the old books from my local thrift store and do my part in recycling, repurposing and reusing! 

Have you seen the designs of Laura Cahill? Lovely, right? Well, you can be a top designer too with this simple tutorial from the eye pleasing blog of Sweet Paul.


This bird house is right up my alley. How clever is this?! Create Studio was kind enough to give us all an online lesson on how to make one! Lucky us and lucky her for being so stinking awesome! 


I have seen book page wreath tutorials on various blogs before, but I think this one takes the cake on loveliness! Katydid and Kid shows you how to do it quite nicely!


              This floral find was spotted at Rag and Bone. I am thinking these will be great attached to a tree branch and placed in a large vase on my credenza. Yes, yes, that is what I will do! Find the tutorial at Folding Trees.


What a great little box to hold the treasures that have captured a young one's mind! Makes a great gift box too!
Check out more from Those Northern Skies.


Did you need to make this bunting to adorn your hallways? I think you do! Tutorial found at Two and Six. Think of how cute it would be made from an old atlas? 


And finally, enjoy this animated story book video to help bring a smile to your face today!

Tuesday, February 23, 2010

Love those Elsa Bags!

I just wanted to give a nice shout out to my lovely and talented friend, Nicole from Elsa Bags! If you are a local here in Utah or even a fan of Shade clothing, you will be happy to know that Elsa Bags are now available in Shade stores for the next 10 weeks!  Nicole is a gem of a seamstress and her bags are all handmade, sturdy and built to last! They are perfect for the many occasions in a lady's life and with all the different fabrics, there is sure to be one (at least) to fit your need! Oh, and P.S. They make great diaper bags for all you preggers out there! 
Nicole has also started a children's line (I don't think this girl sleeps!) and you can check her Etsy site to see what other creations she has whipped up for your little one! Congratulations Nicole, I have a feeling this is just the beginning for you!


Monday, February 22, 2010

Nice Feature!


I have a routine for my day. It's not exciting or unusual. It begins with watching a little Today Show right when I wake up (because I really like Matt Lauer!) followed by a breakfast for the family and then sitting down at the ol' Mac to see how many of you have tuned into H is for Handmade in the past 24 hours. This morning as I sat down at my computer, I had to take a few looks, rub my sleep deprived eyes and question if what I was looking at was real! My numbers had skyrocketed today due to a nice post on Tip Junkie that featured my felt chrysanthemum pillow. Thank you to all who tuned in and a very BIG thank you to Laurie for showcasing my tutorial! What a privilege it is and I can only hope that I can continue to make things that so many more people can enjoy! 

P.S. How awesome is this comment left by one of my readers to start my day out right?:

".....God is good, and I'm glad He blessed you with such creativity".

Dear Cynthia, I think the same thing and thank him for that every night! You are very kind!

Saturday, February 20, 2010

One Rockin' Puppet Show!

I stumbled upon this great video and thought I would share it with you. It not only made me smile, but made me want to make some marionettes (would that be hard?) to perform my very own suitcase puppet concerts! I don't think I have the guts to stand on the streets like these lovely gals, however. Hats off to them! 
(P.S. These girls have style for miles!)


Meet-me-at-Brick-lane-1
Photo taken by A little Hamster on Portobello Rd. in London.

Tuesday, February 9, 2010

Customized Journal Tutorial


  "There is a saying that “paper is more patient than man”.…Yes, there is no doubt that paper is patient and as I don’t intend to show this cardboard-covered note book bearing the proud name of “diary,” to any one, unless I find a real friend, boy or girl, probably nobody cares. And now I come to the root of the matter, the reason for my start ing a diary; it is that I have no such real friend."
-Anne Frank

So heartbraking! Hopefully you will not find solace in this journal craft because you lack friends, but rather something that can be shared with them! Think happy thoughts!
I taught a class on this project a few years ago to a group of women and it went over really well! I hope you like it too!
      

Materials you will need:
Fabric (size depends on your journal size)
Journal (I found this fugly less attractive one at the dollar store!)
Scissors
All purpose craft glue
Elastic
Embellishments of your choice
Matte board or thin cardboard (cereal box/cracker box is perfect!)


1st step: Lay your journal flat on your fabric and cut out with a 1" allowance on all sides and set aside

Measure the inside cover of your journal and cut 2 pieces of cardboard out to that size.

Lay the 2 pieces of cardboard out on remaining fabric and cut out with a 1" allowance on all sides. Set aside.

This is where you are going to get a little messy! Take your glue and apply a liberal amount to the front cover of your journal. Use your finger to smear the glue around on the cover making sure there is an even layer. Clean off fingers with a wet paper towel...hurry!


Lay your fabric on your glued surface and gently smooth out any ripples, creases, or bumps. Allow to dry and then proceed to do the same steps to the back cover and binding. Allow to dry.

Once your glue has had time to dry, open your journal slightly to find the line of the binding. Make 2 small cuts in your fabric stopping at the edge of the book. Apply a very small drop of glue to the fabric and use a toothpick to tuck the flap of fabric into the binding.

Next, apply a line of glue to the edges of the inside of the cover and fold fabric over. You may need to use your finger to smooth the glue down again to assure even coverage.

         
When you get to the corners, fold them in like a present and glue down and continue to glue the remaining edge down.


If you are wanting any kind of ribbon on your journal, this is when you will need to adhere it. Glue the ends of your elastic to the inside and back of your journal. Glue the ends to the inside cover and entire length of the ribbon to the front of your journal. See below:


Now you will want to get your cardboard and fabric. Notch out the corners of the fabric and begin to apply glue to one entire side. Again, gently smooth away any bumps or imperfections. Allow to dry.
Then apply glue to the edges (like you did to the inside cover of your book) and fold fabric in. Allow to dry.


After glue has dried, glue your cardboard onto the inside cover of your journal to hide the mess and decorating the inside! Close journal and stack heavy books on top to weight down all layers for a more finished look. Add any embellishments or notions of your choice to the cover and you will have one darling diary! 

Congrats! You are done! If you are going to be having a baby you can use it to write down all the milestones and memorable moments If you are going on a trip you can use it to hold postcards, ticket stubs, and mementos to look back on one day. Or if you are like me, you need to carry one of these around with you to jot down any ideas, creative thoughts, inspiration that strikes you! 


Journal: $1.00
Fabric: $5.00
Elastic: .30 cents
(glue and embellishments I had on hand)
_________________________________
Total cost: $6.30
Total time to complete project: 1 hr. 20 minutes


Monday, February 1, 2010

Upcoming Shows

February not only celebrates the lovers and romantics, but it also brings us some of the first craft shows of the 2010 year! For all you locals, there are 2 great boutiques happening this weekend. If you are not a local...well, you can just check out the websites for some inspiration and creative ignition and be jealous that you are not here to bask in the glory of all that is craftastic!

Fro those of you who live on the East side of the valley:
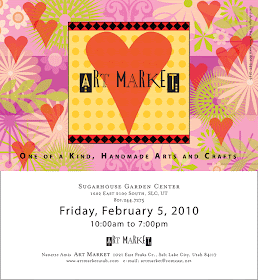
Hooray for Art Market happening at Sugarhouse Park!
Check out the full vendor list and gallery here!
(click image to enlarge)

If you go, you may need to buy this bag!


For those of you on the west side of the valley:
Yippee for Oh Sweet Sadie!
You will love their blog and a sneak peek of the show!
(click image to enlarge)

I think I need to buy one of these canvas prints from Little Duchess while I am there!

*
Are there any other shows happening this month that I should know about? Email me at the address listed in the right hand column and I will post about it!