
Here is the mailbox tutorial I did for U Create. I was asked to wait to post this so that U Create could have exclusivity to it for a month and that it's readers would find it there first. I can't believe that was over a month ago, already! Whaaat? So, now I am presenting it to you...just in case you happened to miss it!
********
My child loves to help us get the mail! He looks forward to the postman coming each day and delivering envelopes filled with what he believes to be invitations to extravagant parties and letters and pictures from Grandma! I don't dare spoil fun by telling him that what he is looking at are merely utility bills and grocery adds! The thought occurred to me that we could have this kind of fun all day long by making him his own little mailbox! Now I love to drop him a little note and picture and watch him pretend the day away and see his imagination run wild!


Materials needed:
1 sheet of poster board
2 sheets of 12X18 stiff felt (a.k.a. Easy Felt)
approx. 1 yard of ribbon (preferably canvas/cotton)
scissors
craft glue or hot glue
patterns printed off computer (provided at the bottom of the post)
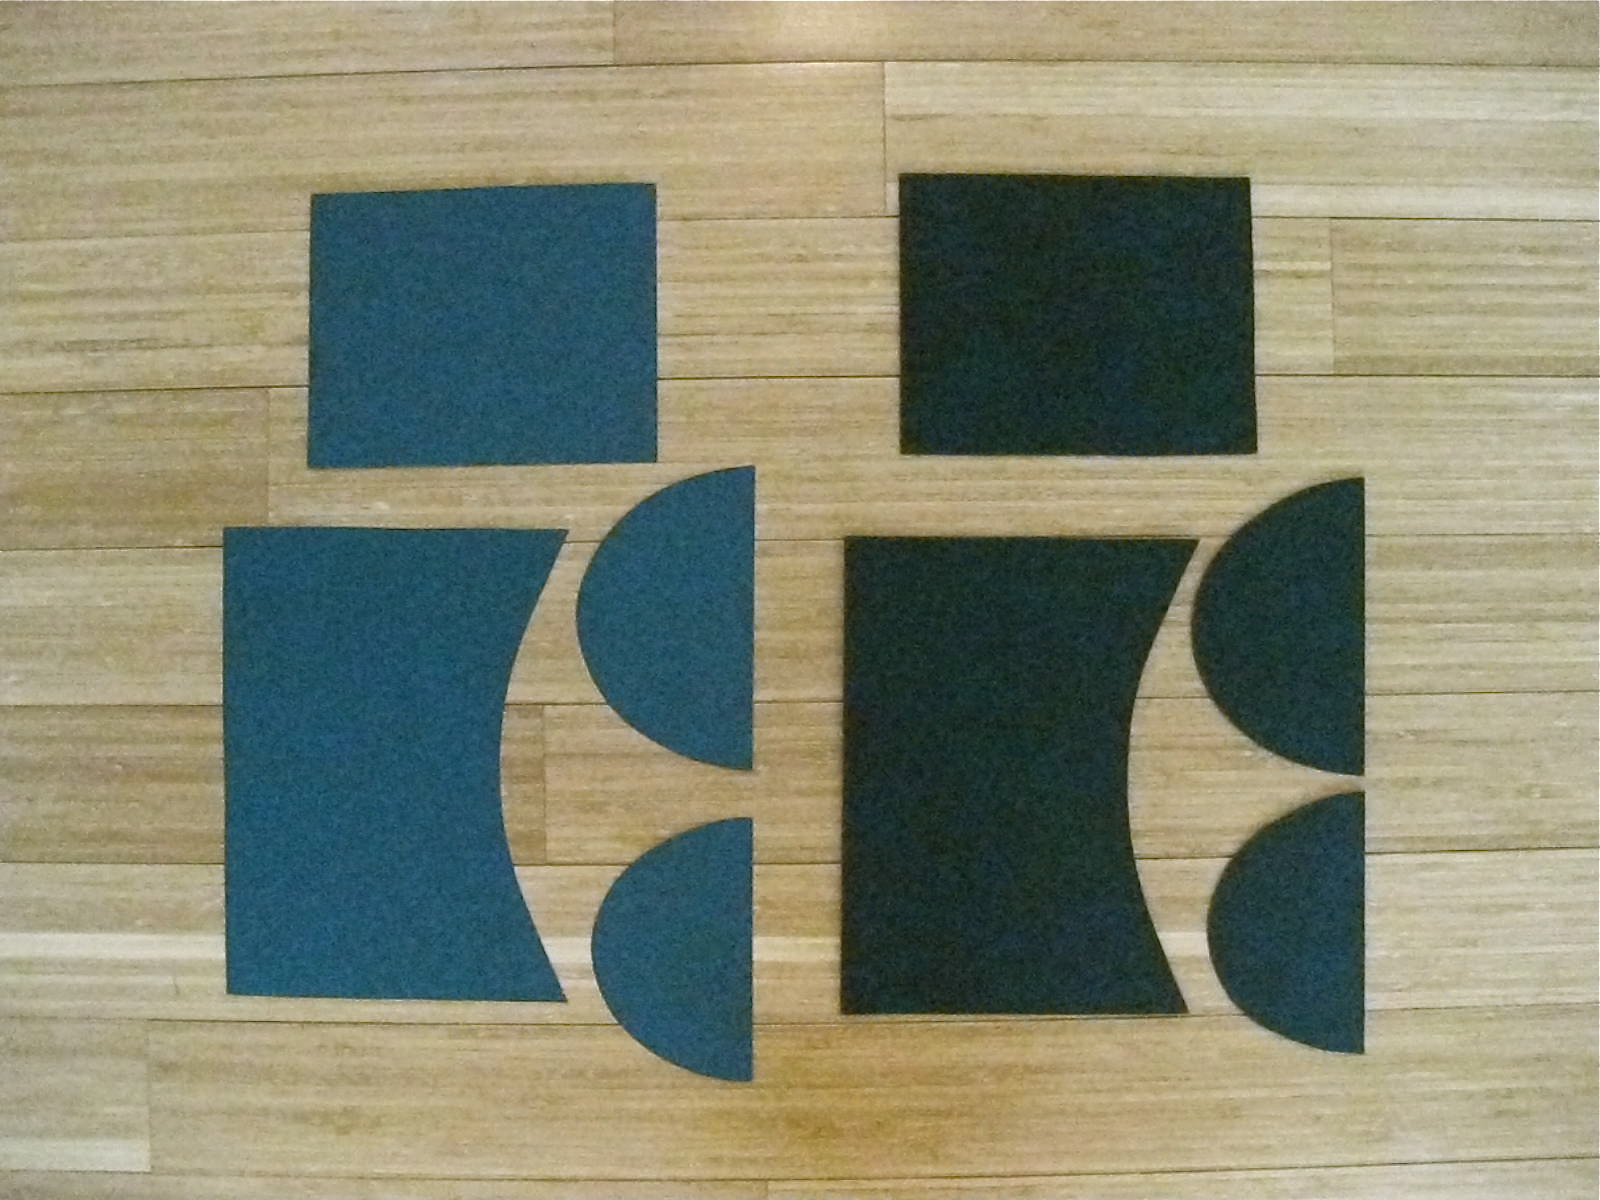
Step 1: After printing the provided patterns, cut 1 set of each piece in both your felt and your poster board. The poster board will provide durability and rigidity to your mailbox. The felt will then be the cover.

Step 2: Cut a strip of ribbon to the length of the side of your back and front piece. Apply glue to the entire area of the ribbon.

Step 3: Glue your 2 pieces of poster board together. Allow glue to dry completely.
The ribbon will act as a hinge and will allow you to fold and bend your pieces more easily.

Step 4: Now apply ribbon to the opposite end of your paper just as you did in step 3. Allow glue to dry completely.

This is what you should have when the 4 steps are complete. The ribbons will be on the INSIDE of your mailbox.

Step 5: Apply glue to the entire exposed area to the back of the ribbon.

Step 5: Fold your front piece over and adhere it to the glue covered ribbon. You will need to hold it down and allow glue to dry completely.

This is what it should look like after all 6 steps are complete.

Step 7: Cut 6 pieces of ribbon measuring 2" in length and glue as shown to the poster board piece labeled "bottom". These will act as tabs and make it possible to adhere the bottom to the mailbox.

Step 8: Begin to glue the tabs to the inside of your mailbox.

This is what it should look like after the 8 steps are complete.

Step 9: Cut a piece of ribbon the length of the top lid of your mailbox and glue to the lid and the back of your mailbox as shown.

Step 10: Now glue all your felt pieces over the poster board for a more finished look.

Now you can add any embellishments you wish! I simply embroidered on a piece of canvas and glued it to the front. I added a ribbon tab under the lid to make it easier to open and I also used it cover my edges to give it a little detail. You can add a hook or loop of ribbon on the back if you want to hang it on the wall or just leave it as is if you are setting in on a flat surface.


Now you can add any embellishments you wish! I simply embroidered on a piece of canvas and glued it to the front. I added a ribbon tab under the lid to make it easier to open and I also used it cover my edges to give it a little detail. You can add a hook or loop of ribbon on the back if you want to hang it on the wall or just leave it as is if you are setting in on a flat surface.

*Templates*
Print out at 100%


Print out at 100%


2 comments:
So super cute.
This is so cute! However, I couldn't get it to print any larger than shown so before printing I switched it to 300% and it worked great. Thanks for the great idea.
Post a Comment