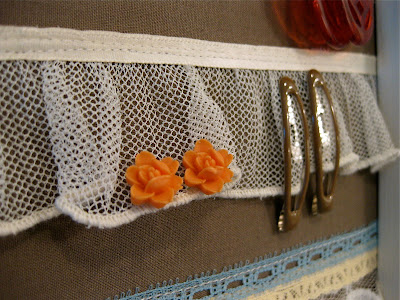
Here is a great user friendly way to store your earrings and have them be accessible from all angles! I really liked some of the ideas that I have seen on other blogs with embroidery hoops, frames with chicken wire etc..., but I wanted something that I didn't have to take off the wall or lift up in order to get my earrings off. The solution? Lace!
I went to my local thrift store and found this framed water color. I immediately tossed the water color and it's mat in the garbage but kept the cardboard backing. I then painted my frame. Coincidently, the paint color I had was Queen Anne's Lace! It's all so serendipitous!
I paid $3 for the frame which is still, in my opinion, a bit pricey for a thrifted frame. But, I figured that since I had all the other materials I needed on hand, that this would be my one and only expense for this project. I can handle that.
I dumped all my lace out on the table and rummaged through it. I wanted to see all my options and play with the colors, widths and textures.
I started by taking the cardboard backing and measuring a piece of fabric by it. I allowed for a 1" fold on each side and trimmed it accordingly.
Then, I began to place my lace on the fabric. I pinned it and measured it
so that I knew it was straight. I trimmed it to the length of the fabric and I then sewed each piece on.
I sewed along only the top of the lace so that it could be flipped up to attach and remove earrings easily.
After my lace was all sewn on, I pressed it using a cool setting as to not burn the lace. This removed all puckering and helped my lace lay nice and flat.
Next, I laid my cardboard down on the back of the fabric and used double stick tape (you can use hot glue or craft glue) and began folding my edges over.
Hint: Fold one side over and then do the direct opposite side (i.e. top then bottom). This will ensure a better and more snug fit than if you just went around the frame in order.
After all my sides were folder over, I set it into the frame and used the wire that was already provided by the previous owner.
Then I was ready to adorn it with my earrings and favorite hair clips and hang it either on the wall or back of my door!
The lace is perfect for both earrings with posts and lever back earrings.
Hair clips go on and off in a breeze, too!
Ta-Da! It took me only an hour to do and for $3, who can complain? Not this lady!
*Also, click HERE to see the where I linked this project to and support all that is handmade!*
*Also, click HERE to see the where I linked this project to and support all that is handmade!*


